Dynamic Penches

Dynamic Penches
V and T Flex Circuit Training Students

Tuesday, October 1, 2013

A New First-Person Post from StretchGym Model Emma


I began dancing at the age of four.  Since then, I've been training at a pre-professional ballet school.  When I was young, I did not have natural flexibility.  As a ballet dancer, flexibility is very important so I began stretching.  I took a stretch class every week, but the class wasn't enough help.  I wanted to not only focus on increasing my flexibility, but also to develop the core strength necessary to hold these positions.  The design of the StretchGym allowed me to reach my highest potential in flexibility.  One of my favorite aspects about the StretchGym is that it provides resistive stretching.
I struggled particularly with my straddle stretch and frog stretch (see left).  I was about four inches off the floor from being flat.  Resistive stretching helped me to warm up my muscles more effectively.  After about five months of consistent stretching I could lay flat comfortably in my straddle.


Although I had my right and left splits, I used the StretchGym for my over-splits.  I started off on the lowest bar, and as the position became more comfortable, I would try the next higher bar to increase resistance. My over-splits have been my biggest area of improvement. The photo below was taken in 2010, after 2 months of training on the StretchGym.
Today I am able to reach between the 4th and 5th bars on the StretchGym, which is about a 225 degree over-split.  
This has also improved my developes that I can now hold at 180 degrees.

Here are my vertical over-splits from 2010 (on left) to 2013 (on right).
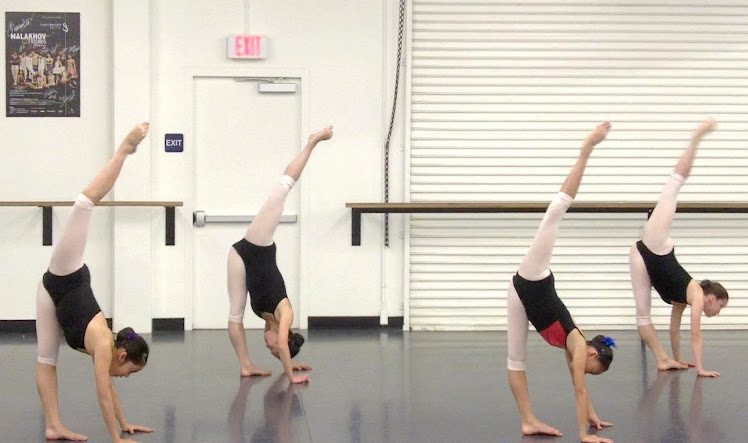
Through these stretches I have also worked on my penches.  Every week after my muscles were warm from stretching, my stretch trainer would record my static and active penches.  My static (held) Penche and dynamic (kicking) penche are shown on below on the right.

We analyzed my progress after several weeks and noticed quite a difference.  Since then I have also been practicing balancing in an overstretched penche position.  Balancing in a penche position without touching the ground has been a challenge.  My trainer has taught me to lean back on my standing leg while pulling my working leg towards my head to achieve a greater angle.  While stretching in this position has become easy, balancing is more difficult.  Photo on left from 2011, right is 2013.

 Left, 2011; Right, 2013

By adjusting my torso a bit to the side, and leaning back more, my trainer showed me that I could perform over-split side and front kicks.  The collage is from 2011.
Side and front kicks from 2013 below.

I have been also working on my back stretches which include twisting, front bends, back-bends  back leg over-splits and arabesques.  As a dancer there is always room for growth and improvement, and the StretchGym has helped my flexibility beyond what I had ever imagined!

More Stretch Videos Featuring Emma:

Emma was one of our earliest test users of the StretchGym.  Her feedback has been instrumental in developing many refinements and new exercises.  Emma graduated with honors from high school, and is now a freshman in college.


Tuesday, March 15, 2011

Resistive Stretching, Strengthening, and Conditioning

Resistive stretching is a relatively recent flexibility technique that in our experience warms up the stretched muscles much quicker.  In some of the variations, it also strengthens and conditions (e.g., when applied to arabesques or developpes).

A good example of assisted resistive stretching is for "Supine Leg Extensions" (which we call "Leg-Ups").  This is one of our dancers' favorite stretches!

Assisted Supine Leg Extensions (Standard)
1. Stretcher lies down on her back, on the floor (or on a mat) with legs facing partner.

2. Making sure that the leg to be stretched comes up straight over the torso, partner gently pushes leg towards head until finding the "point of tension" (the point at which significantly increased resistance is felt).

3. Partner asks stretcher to resist by pushing against the stretch (using the leg only) while partner maintains the stretched position firmly.  Hold for 8 or 10-count.
4. Rest for 8 or 10-count.
5. Perform steps 3 and 4 for three iterations.
6. Partner tells stretcher to relax and not resist while partner pushes leg toward floor as far as it will go (or until stretcher says "Stop").


7. Repeat for other leg.

NOTES
a. Alignment is very important; keep body straight and stretch leg over front of body, not sides.
b. If the initial "point of tension" is too close to the head (i.e., if the stretcher's leg can go all the way down to the floor when "cold"), this exercise will not be very productive (see advanced variations of this exercise below).
c. Always start with the weaker leg ("bad side").
d. Partner should use one hand to keep other leg down and in proper position, if necessary.

Advanced Assisted Supine Leg Extensions (Variation-1)
1. Stretcher lies down on a raised bench with hips at the end (so that lower leg can angle down towards floor).  The more flexible the stretcher, the larger the angle.
2. Follow the instructions for the standard exercise above.


Advanced Assisted Supine Leg Extensions (Variation-2)
1. Stretcher performs splits on the floor, in front of partner.
2. Partner firmly holds front leg by the ankle and lifts until "point of tension" is found, making sure stretcher's torso remains in contact with floor, hips are squared, legs straight.  Note that this exercise can be performed for either front or back leg.

3. Partner keeps stretcher firmly in "oversplit" position and asks stretcher to resist by pushing down (with leg only) for 8 or 10-count.
4. Partner allows stretcher's leg to return on the floor (normal splits position) for 8 or 10-count.
5. Perform steps 2 to 4 for 3 iterations.
6. Partner tells stretcher to relax and not resist while partner lifts leg until stretcher says "Stop".


7. Repeat for other leg.

Resistive Stretching and Strengthening for Developpes and Arabesques
The following details steps for developpe to the front, but same principles apply to side developpes and arabesques.

A. Resistive - Positive
1. Stretcher stands at barre with one hand on the barre, facing partner.
2. Partner lifts leg as high as possible until the "point of tension" is reached.
3. Partner holds leg in place (stretched position) while stretcher pushes leg down for 8 or 10 counts.
4. Stretcher rests leg for 8 or 10 counts.
5. Repeat steps 2 to 4 for 3 iterations.
6. Partner tells stretcher to relax and not resist as partner lifts leg as high as possible (until leg touches touches wall behind stretcher, or stretcher says "Stop".
7. Repeat for other leg.

B. Resistive - Negative1. Stretcher stands at barre with one hand on the barre, facing partner.
2. Stretcher lifts leg as high as possible (where she can hold for 3 seconds).
3. Partner gently pushes down on leg while stretcher tries to lift higher for 8 or 10 counts.
4. Stretcher rests leg for 8 or 10 counts.
5. Repeat steps 2 to 4 for 3 iterations.
6. Repeat for other leg.

Friday, March 11, 2011

Movement and Progress Assessment Using Video

My objectives were to record and analyze dance movements, such as leg extensions, kicks, jetes, and penches.  At the end of about every other class, we capture videos of the students going across the floor, usually ending with static and dynamic arabesque penches.  We also periodically take image frames from these videos to chart progress over time.


I used to own Sony camcorders, which cost over $900 not too many years ago.  Today, I use a cheap (around $100) Kodak Camcorder, which measures about 2.5" x 4.5" x .75" and records1080 HD on SDRAM cards.  I chose this particular "flip" camcorder for its 720 at 60 frames/second mode, which is necessary for clear frame-by-frame analysis of rapid movements (such as jetes). 
 
A significant drawback is the limited 3X optical zoom, which does not support wide-angle views.  This is very constraining when attempting to record group pieces in a classroom.  The 5MB photo mode is nothing to brag about either.  However, the video quality in 1080 HD mode can be breathtaking in good lighting, and rival far more expensive camcorders.

One technique I use to show progress, or to combine multiple captures for a session, is to overlay images by cropping, cutting and pasting in transparent mode.  This can be done even in MS Paint.


Next time, I will discuss some of the considerations in improving certain types of stretches, such as splits, straddles, developes, and arabesques.

Exercise Sequences and Variations

While there are no hard-and-fast rules governing the order/sequencing of exercises in our Flexibility Circuit Training, we do encourage the stretching of opposing muscle groups when applicable (such as back bends followed by front bends or hamstrings followed by quads).
Left to their own devices, the starting point may happen to be either the stretcher's favorite stretch, or a vacant spot within talking range of a friend.  If left up to us, Karen and I would start each dancer out on the stretch we feel needs the most improvement.

A typical sequence may consist of the following:
A. Hamstrings
 

B. Splits/Oversplits
  

C. Back Bends
  

D. Forward Bends
   

E. Straddles


F. Arabesques


G. Developes


Next time, I'll discuss the video capture of static and dynamic kicks, jetes, and penches, as well as the charting of progress.